


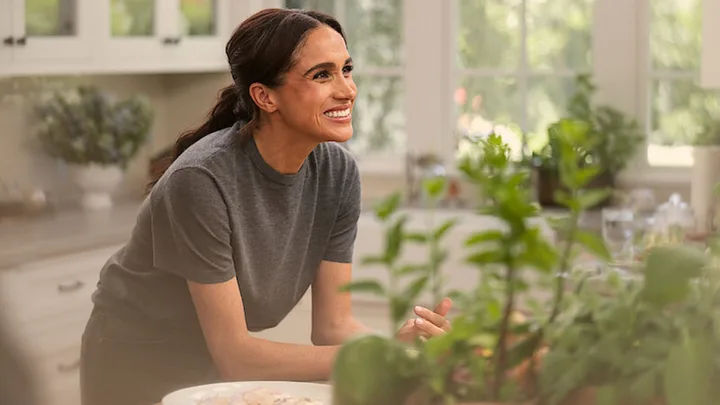
While her acting career and role as Duchess of Sussex have cemented Meghan Markle as one of the world’s most famous faces, it’s her love of good food that stole the spotlight in her highly anticipated Netflix cooking series, With Love, Meghan.
As she continues to re-invent herself away from royal life and set up her own lifestyle brand, As Ever, and online store, – it’s clear her passion for cooking, creating, and sharing her experiences with the masses is where her focus will be cooking forward.
This is especially evident in the 16-episode series where Meghan and her special guests shared personal tips and tricks for the kitchen and garden, hosting hacks, inspiration for crafting, and more.
With season three of With Love, Meghan rumoured to be arriving on our screens very soon and a Christmas special on the way, we’ve rounded up some of our favourite recipes from seasons one and two of the show.
The best recipes from ‘With Love, Meghan’

Truffle Popcorn
INGREDIENTS
- 1/3 cup dry popcorn kernels
- 2 tablespoons neutral oil, such as vegetable oil or avocado oil
- Truffle oil, to taste
- Truffle zest, to taste
- Truffle salt, to taste
- Flaky salt, to taste
METHOD
- Heat oil in a large pot over medium-high heat with 1 or 2 popcorn kernels.
- When those two kernels pop, you know your oil is at the right temperature. Remove the kernels if still in the pot and immediately add the rest of the kernels.
- Cover the top with a lid, leaving a small slit for steam to escape.
- You know your popcorn is done when the popping sound reduces to a pop every 2-3 seconds.
- Quickly transfer the popcorn into a bowl and drizzle with truffle oil. Toss to coat.
- Season with the truffle zest, truffle salt, and flaky salt, and toss again.
- If you aren’t enjoying the popcorn right away, allow it to cool completely before packaging it up.

Tulip Toasts
EQUIPMENT NEEDED
- Kitchen shears, for chives
- Platter or tray for serving
INGREDIENTS
- Pumpernickel bread
- Herbed goat cheese
- Chives
- Small basil leaves
- Nasturtium flowers
METHOD
- Toast pumpernickel bread. Then let it cool.
- Spread cooled pumpernickel bread with herbed goat cheese.
- Use chives to create the “stems” of the tulip on the toast.
- Arrange a few of the small basil leaves to create the “leaves” of the tulip on the toast.
- Place the nasturtium flowers at the top of the “stems” to complete the tulip.
- Arrange on a platter and serve.

Kimchi
Recipe courtesy of Roy Choi
INGREDIENTS
- 1 cup gochugaru
- 1 cup peeled onion
- 1/2 cup water
- 15 garlic cloves, peeled
- 1/4 cup peeled and chopped ginger
- 2 tablespoons kosher salt
- 2 tablespoons sugar
- 1/4 cup plus 2 tablespoons fish sauce
- 2 tablespoons oyster sauce
- 2 tablespoons natural rice vinegar (not seasoned)
- 1 tablespoon soy sauce
METHOD
- Put all the ingredients into a blender and blend until you get a smooth puree.
- You can toss this paste with your favorite fruit or vegetable to create a quick kimchi or use it as a dip for a crudité platter or fruit board.

Quickles
Recipe courtesy of Roy Choi
INGREDIENTS
- 2 to 4 cups of whatever vegetables you want in total, cut any way you want
- 11/2 cups rice vinegar
- 1 tablespoon minced garlic
- 2 teaspoons chopped fresh dill
- 1 tablespoon Diamond Crystal kosher salt
- 1 tablespoon sugar
- 1 bay leaf
- 1 tablespoon mustard seeds
- 1 teaspoon coriander seeds
- 1 teaspoon fennel seeds
- 1 teaspoon crushed red pepper flakes
METHOD
- Place the vegetables in a few small jars with lids.
- In a medium pot, combine the vinegar, 1 1/2 cups water, garlic, dill, salt, sugar, bay leaf, mustard seeds, coriander seeds, fennel seeds, and a pinch of pepper flakes.
- Bring it to a boil, then immediately pour it over the vegetables. Make sure the vegetables are submerged in the brine so they’ll pickle properly.
- Cool, uncovered, at room temperature.
- Cover and refrigerate.
- Once they’ve sat for a few hours, the pickles are ready. Keep in the fridge for up to two weeks.

Foccacia
INGREDIENTS
- 2 cups bread flour or all-purpose flour
- 1 teaspoon kosher salt
- 1 tablespoon olive oil, plus more for drizzling/coating the pan as well as the focaccia
- 1 teaspoon instant yeast
- 1 cup warm water (75 to 80 degrees Fahrenheit)
- 1-3 sprigs of rosemary leaves
- Flaky sea salt, to taste
METHOD
- In a large mixing bowl, whisk together the water, yeast, flour, and olive oil until a shaggy dough forms.
- Add the salt and mix until the dough comes together. It will be sticky.
- Coat the top of the dough with a thin layer of olive oil and cover with a tea towel.
- Place the dough in a warm place and let it rise for 2 hours.
- Preheat the oven to 425 degrees Fahrenheit.
- Once the dough has risen, turn it out into a well-oiled enameled cast-iron braiser or baking pan.
- Gently stretch the dough to the edges of what you are baking it in. Be gentle and patient at this step. It may take a few tries to get the dough to that shape.
- Cover with a towel or plastic wrap and put in a warm place to let rise in the pan for another 30 minutes.
- Once the dough is ready, coat your hands in olive oil and gently dimple the top of the dough to create small wells with your fingers.
- Drizzle generously with more olive oil, rosemary, and flaky sea salt.
- Place in the oven and bake for 20-25 minutes or until lightly golden.
- Remove from the oven and carefully remove from the pan.
- Slice, serve, and enjoy!

Plantain Chips
INGREDIENTS
- 2 large green plantains
- 2 tablespoons olive oil
- Optional: ground cumin to taste
- Optional: chili lime salt
- Flaky sea salt, to taste
METHOD
- Preheat the oven to 350 degrees Fahrenheit and line a large baking tray with parchment paper.
- Peel the plantains by cutting the ends off and slicing gently down the length of the plantain skin a few times. The goal is to cut through the piece while not piercing the flesh of the plantain. This should make it so the peel comes off easily. Discard the peel.
- Using a sharp knife, thinly slice the plantains into even coins as thin as possible. Slicing to an even thickness will ensure an even bake and crispiness.
- Place the plantain chips into a bowl and toss with olive oil to evenly coat.
- If using seasoning, add here, tossing again to ensure even distribution.
- Line the plantains on the prepared baking sheet in an even layer and sprinkle with flaky sea salt.
- Bake for 10 minutes, flip, and bake for an additional 10–13 minutes until the chips are lightly browned and beginning to get crispy. They’ll crisp up a lot more once they cool.
- Let it cool down and enjoy!

Garden Salad
INGREDIENTS
For the salad:
- Mixed lettuce, like little gem or red gem
- Optional: chive blossoms
- Optional: bachelor’s button petals
For the vinaigrette:
- 1 to 2 cloves garlic, cut into thirds
- Pinch of kosher salt
- Sherry vinegar
- 5 tablespoons olive oil, divided
- Juice of ½ lemon
METHOD
- Wash the lettuce thoroughly. To dry, lay out the leaves in a single layer on a kitchen towel. Top with another kitchen towel and repeat until all the leaves have been laid out. Put a kitchen towel over the final layer and then gently roll up from one end to the other. This helps to dry the leaves. Any leaves not being used can be held this way in the refrigerator.
- While the lettuce is drying, make the vinaigrette. Start by adding the garlic and a pinch of salt to a mortar and pestle (or whatever you use to grind) and grind them together.
- Add a few teaspoons of sherry vinegar directly to the mortar and pestle and grind a touch more. Set aside and allow the mixture to macerate for a few minutes.
- From there, add a few tablespoons of olive oil into the mortar and half the amount of sherry vinegar.
- Season to taste with salt and mix.
- Add juice of half a lemon, mix again, and taste. Balance it out with more oil if it is too acidic, more vinegar if it needs more bite, and more salt if it isn’t seasoned well enough.
- Place the desired amount of dried lettuce into a serving bowl.
- Pour a little bit of the dressing over the greens and, with clean hands, toss everything together.
- Garnish with chive blossoms and bachelor’s button petals, if using.
- Serve immediately and enjoy!

Caramelised Onion Tart
Yield: 4-6 servings
INGREDIENTS
- 3 tablespoons salted butter
- 1 tablespoon olive oil
- 2 medium yellow onions, thinly sliced
- ¼ teaspoon fresh thyme, plus more for garnish
- 1 tablespoon sugar
- 1½ tablespoons balsamic vinegar
- ¼ teaspoon garlic powder
- Salt and pepper, to taste
- 120g Gruyère cheese, grated
- 1 package (approx. 500g) frozen puff pastry, thawed, but still cold
- 1 egg, lightly beaten
- Balsamic vinegar glaze, for garnishing
- Flaky sea salt, for garnishing
METHOD
- Preheat the oven to 200°C.
- Caramelise the onions: Melt 3 tablespoons of butter along with 1 tablespoon of oil and sauté the onions for 5 minutes.
- Add the fresh thyme and sugar and continue to cook for 25 minutes on medium-low heat. Make sure to stir the mixture every 5-10 minutes. If the onions are caramelising too fast, turn down the heat a little more.
- Deglaze the onions: Add the balsamic vinegar to deglaze the pan, and allow the onions to soak it all in. Turn off the heat.
- Season with the garlic powder, salt, and pepper to taste, and stir to combine.
- Allow to cool to room temperature.
- Add the Gruyère cheese and mix well.
- Position two racks in the upper and lower thirds of the oven. Line 2 baking sheets with parchment paper.
- Using a sharp knife, cut the puff pastry into 5cm squares and place them on a lined baking sheet.
- Make sure the puff pastry is cold. If not, allow it to chill in the refrigerator for 10-15 minutes before proceeding.
- Using a pastry brush, brush the beaten egg on the squares.
- Prick the puff pastry using a fork in the centre.
- Place 1 tablespoon of caramelised onion mixture in the centre.
- Bake for 20-25 minutes until crisp and golden brown, rotating halfway through for an even bake.
- Finish with a drizzle of balsamic vinegar glaze, a pinch of flaky sea salt, and fresh thyme.
- Let cool slightly before serving. Leave in squares or cut into bite-sized pieces.
- Enjoy!

Sourdough Bread
Yield: Active starter and 1 loaf of sourdough bread
EQUIPMENT NEEDED
- Glass jar, for starter
- Kitchen scale
- Cheesecloth
- Rubber bands
- Larger glass jar, for feeding active starter
- Mixing bowl
- Tea towel
- Bread banneton
- Bench scraper
- Bread lame, for scoring
- 6-7 litre Dutch oven
INGREDIENTS
To create the active starter:
- 113 grams rye flour
- 113 grams room-temperature water, plus more for growing and feeding
- 113 grams all-purpose flour, plus more for growing and feeding
To feed the active starter:
- 113 grams active starter
- 113 grams of room-temperature water
- 113 grams all-purpose flour
For the sourdough loaf:
- 300 grams of room-temperature water
- 100 grams active starter
- 10 grams kosher salt
- 320 grams of bread flour
- 80 grams whole wheat flour
- Rice flour or all-purpose flour, for dusting
METHOD
Create your active starter:
- Day 1 – Combine 113 grams of rye flour and 113 grams of room-temperature water in your sourdough starter jar. Mix with a spatula until smooth; the consistency will be thick and pasty. Loosely cover with cheesecloth and a rubber band. Let it sit in a warm spot on the counter for 24 hours.
- Day 2 – Weigh out 113 grams of starter. Discard the rest of the jar’s contents. Combine with 113 grams of all-purpose flour and 113 grams of room-temperature water. Loosely cover with cheesecloth and a rubber band and let sit on the counter for 24 hours.
- Day 3, Pt. 1 – Weigh out 113 grams of starter. Discard the rest of the jar’s contents. Combine with 113 grams of all-purpose flour and 113 grams of room-temperature water. Loosely cover with cheesecloth and let sit on the counter for 12 hours.
- Day 3, Pt. 2 – Repeat feeding with the same measurements and let sit for another 12 hours.
- Day 4 – Repeat the same two steps from Day 3.
- Day 5 – Repeat the same two steps from Day 4. At the end of Day 5, your starter is “active” and you can now use it to make bread.
Feed the active starter:
- The night before you are ready to bake a loaf, feed your active starter.
- Stir together the active starter, water, and all-purpose flour in a jar that is large enough for the mixture to double in size. Wrap a rubber band around the jar where the top of the mixture is, so you can get a sense of how much it is growing.
- Cover the jar loosely with a lid, cheesecloth, or plastic wrap. Leave in a warm place (about 27°C) for at least 4 hours and up to 12 hours. Note: If you want to start your bread first thing in the morning, feed your starter the night before, and it will be ready to use when you wake up.
Make the dough:
- In a large bowl, mix together the water, starter, and salt. Add the bread flour and whole wheat flour and stir until combined. The result will be a wet, sticky dough ball. Cover with a tea towel and let rest for 30 minutes.
- Take the remaining starter and feed it equal parts flour and water to maintain it. Keep it covered with cheesecloth or plastic wrap and a rubber band. This is now the starter that you are maintaining, and it can live on your counter or in your fridge.
Stretch and fold the dough:
- After 30 minutes, grab a corner of the dough and pull it up and into the centre. Repeat until you’ve performed this same action 4-5 times around the circumference of the dough.
- Cover and let rest for another 30 minutes.
- Repeat the stretching and folding action 3 more times every 30 minutes.
- After the fourth time folding the dough, let the dough rest in a warm place (about 27°C) until the dough doubles. The timing will depend on the temperature that day. If it’s warm, it can take just 1½ hours. If it’s a colder day, it can take up to 3-4 hours.
Shape the sourdough:
- Gently transfer the dough to a clean work surface dusted with some plain flour.
- Fold the dough envelope-style: top third over to the centre; bottom third up and over the centre. Then repeat from left to right.
- Turn your dough over and use a bench scraper to push the dough up, then back towards you to create a tight ball. Repeat this pushing and pulling until you feel you have some tension in your ball.
- Place the boule on some flour and let it rest for 40 minutes on the counter covered with a tea towel.
- Line the bread banneton with a clean tea towel. Lightly dust with some rice flour or all-purpose flour.
- After the dough has rested, repeat the envelope-style fold as well as the shaping with the bench scraper, pushing and pulling until you have a tight ball again.
- Place the dough ball presentation side down (seam side up) in your prepared tea towel-lined banneton.
- Pull the ends of the tea towel over the dough to cover. Transfer the dough to the refrigerator overnight. Note: You can leave the dough in the fridge for up to 2 days before baking.
Bake the sourdough:
- Preheat the oven to 260°C with the Dutch oven inside. While the oven is preheating, take your sourdough out of the fridge.
- Sprinkle the exposed dough with white rice flour or all-purpose flour and turn it out onto a sheet of parchment paper.
- Sift some plain flour over the dough, making sure to cover it well. Rub off any excess flour, taking care not to press down on the dough.
- Use a thread to mark the bread into quadrants. This will help keep the decorative scoring consistent.
- Using a sharp razor blade or lame and quick, fluid motion, score the dough as you like. Be sure not to press too deeply or to go too close to the base of the dough, as this will not allow it to rise vertically and will cause it to spread horizontally.
- Grab the ends of the parchment and carefully transfer the dough into the hot Dutch oven.
- Put the lid on. Lower the oven temperature to 230°C. Bake, covered, for 30 minutes.
- Remove the lid and lower the oven to 200°C. Bake for another 20 minutes or until the bread has darkened to your liking.
- Carefully lift the loaf out of the Dutch oven and cool for 45 minutes before cutting.
- Serve and enjoy!

Coconut French Toast
Recipe courtesy of Tan France
Yield: 2 servings
INGREDIENTS
- 1 loaf milk bread, sliced
- 3 large eggs
- 1 cup half-and-half (see Tip)
- Splash whole milk
- 1-2 teaspoons powdered (icing) sugar, plus more for serving
- Ground cinnamon, to taste
- Grated coconut
- Salted butter, plus more for serving
- Fresh fruit, for serving
- Maple syrup, for serving
- Optional: flower sprinkles, for serving
METHOD
- In a shallow bowl, whisk together eggs, half-and-half, whole milk, cinnamon, and powdered sugar.
- Put the coconut in another shallow bowl.
- Meanwhile, place a non-stick pan over medium heat. Melt enough butter to coat the pan.
- Toast each slice of bread for 1 minute or so to get the exterior a little crispy before adding to the custard mix.
- Dip each bread slice in egg mixture and poke with a fork to allow the mix to get further into each slice, making sure to coat both sides.
- Dip each slice into the shredded coconut, making sure to coat both sides.
- Place dipped bread into a hot pan with more butter and cook for about 4 minutes, flip, and continue to cook for another 4 minutes on the other side.
- Repeat for the rest of the bread, adding more butter as needed.
- Garnish with fresh fruit, butter, powdered sugar, maple syrup, and flower sprinkles if desired.
TIP – Half-and-half is not typically available in Australia. Make your own by combining equal parts full-cream milk and cream.

Roast Chicken
INGREDIENTS
- 2.2kg-2.7kg roasting chicken
- 4-6 carrots, halved and cut into 5cm pieces
- 1 yellow onion, peeled and quartered
- 6-8 stalks of celery, cut into 5cm pieces
- ½ bunch thyme
- 3 bulbs of garlic, halved, divided
- Olive oil, as needed
- Kosher salt, to taste
- Freshly ground black pepper, to taste
- A few sprigs of fresh sage leaves
- A few sprigs of rosemary
- 2 fresh or dry bay leaves, divided
- ½ lemon
- 4-6 tablespoons unsalted butter, softened, to taste
METHOD
- Preheat the oven to 220°C.
- Pat the outside of the chicken dry.
- Allow the chicken to temper on the counter while you prepare your vegetables.
- Arrange the vegetables at the bottom of a large braiser (or Dutch oven) and drizzle with olive oil, season with salt, and toss to coat. Nestle two bulbs of garlic in with the vegetables, along with the thyme sprigs.
- Pat dry the chicken again with a paper towel. Drizzle the chicken with olive oil and liberally season the cavity and the outside of the chicken with salt and pepper.
- Stuff the cavity with 1 halved bulb of garlic, fresh sage, rosemary, fresh bay leaf, and ½ of a lemon.
- Tie the legs together with kitchen twine and tuck the wing tips under the body of the chicken.
- Breast-side up, gently work to release the skin from the meat of the bird.
- Spread the butter between the skin and the meat and all over the exterior of the bird.
- Tuck the last bay leaf under the skin of the bird.
- Place seasoned and tied chicken on top of the vegetables, breast-side up.
- Roast the chicken for 60-90 minutes, legs toward the back of the oven, until the internal temperature is 74°C, or until the juices run clear when you cut between a leg and thigh.
- Allow chicken to rest for 15-20 minutes before carving and serving.
- Enjoy!

Radhi’s Masala Chai
Recipe courtesy of JoyFull by Radhi Devlukia
INGREDIENTS
- 1 to 2 black tea bags (optional)
- 1 teaspoon homemade Chai Masala
- 1 sprig fresh mint leaves
- Optional: ¼ teaspoon minced or grated fresh ginger
- 1 cup unsweetened vegan milk
- 1 teaspoon coconut sugar, plus more to taste
METHOD
- In a medium saucepan, bring ¼ cup of water to a boil over high heat.
- Add the tea bags (if using), the masala, mint, and ginger, and return to a boil.
- Reduce the heat to a simmer, then immediately return the mixture to a boil.
- Repeat this once more and then bring the mixture back to a simmer.
- Stir in the milk and sugar and return to a boil once more.
- Remove the pan from the heat and strain half the mixture over a mug. Do the same with a second mug and serve.
HOMEMADE MASALA CHAI MIX
INGREDIENTS
- 3 tablespoons ground ginger
- 2 tablespoons ground cardamom
- 1 tablespoon freshly ground black pepper
- 1 tablespoon ground cinnamon
- 1 tablespoon ground cloves
- 1½ teaspoon ground nutmeg
METHOD
- Use a mortar and pestle or spice grinder to grind spices into a fine powder.
- Transfer the mixture to a tightly sealed jar and store for up to 2 weeks.




Clare’s Magical Green Juice
Recipe courtesy of Chef Clare Smyth
Servings: 5 cups
EQUIPMENT NEEDED
Cold-press juicer
Measuring cups
INGREDIENTS
- 1 whole Continental cucumber
- 1 bunch celery, chopped
- ½ head Cos lettuce, chopped
- 3 green apples (skin on), core removed
- 5 leaves lacinato kale or Tuscan kale, chopped
- 1 lime, peel and pith removed
- 1 orange, peel and pith removed
- 1½ cups mint leaves
- 2 tablespoons fresh ginger
METHOD
- Fit a receptacle to catch pulp from the juicer on one side and a liquid measuring cup to catch the juice on the other.
- Feed prepped ingredients through the juicer. The kale leaves and mint leaves will need additional ingredients to help them along, so add them midway through the process.
- Strain if desired.
- Serve and enjoy!

Thumbprint Cookies
- 115g unsalted butter, softened
- ¼ cup granulated (caster) sugar
- ⅓ cup powdered (icing) sugar
- 1 egg yolk
- 1 teaspoon vanilla extract
- Zest of ½ lemon
- 1¼ cups all-purpose flour
- Pinch of salt
- Raspberry preserves or the preserve of choice
- Optional: extra granulated sugar for coating
METHOD
- Preheat the oven to 160°C.
- Prepare a baking tray and line it with parchment paper. Set aside.
- In a large bowl, cream together the butter and both sugars using an electric mixer. Alternatively, this can be mixed by hand using a wooden spoon with a little elbow grease.
- Add the egg yolk and vanilla, and mix until combined.
- Add the flour and salt, and continue to mix until the dough forms.
- Scoop the dough with a small cookie scoop, about 2 teaspoons in size.
- Roll the dough into a small ball and toss in granulated sugar, if using.
- Using your thumb, press in the centre to make a small well. Repeat this process until you have all your cookies on your sheet tray.
- Fill each cookie with about a ½ teaspoon of preserve of your choice.
- Bake the cookies for about 7-10 minutes, or until lightly golden brown.
- Allow to cool completely and enjoy!

Boquerones
INGREDIENTS
- Baguette slices, toasted (roughly 1.5cm-2.5cm thick)
- Tomatoes, seeded and chopped
- Flaky sea salt, to taste
- Extra-virgin olive oil, to taste
- Tinned Boquerones fillets (white anchovies)
- Freshly cracked black pepper, to taste
- Flat-leaf parsley leaves, to garnish
METHOD
- To build a toast: Spoon some chopped tomato on top of a toasted baguette slice.
- Season with flaky sea salt and drizzle with extra virgin olive oil to taste.
- Arrange 1-2 Boquerones fillets on top of the tomatoes.
- Finish with a few turns of freshly cracked black pepper and a leaf or two of flat-leaf parsley.
- Repeat to the desired number of toasts based on party size.
- Arrange on a platter and enjoy!
See more recipes from With Love, Meghan here.


